Showing posts with label Class. Show all posts

Friday, March 12, 2021

Dying for Socks


So I got this pair of socks done in record time, 8 days. Wow ! I cast them on the needles on a Sunday and got then finished the following Sunday. This is sock pair # 4 started and finished in this year. 


I got a chance to take a sock knitting class on line with Kate Atherley. I took a mitten and glove class from her 2 years a go. I also have her sock book, it was on my Christmas list and mom got it for me.  So I picked this yarn that is a little bit larger then store sock yarn. This still has 10% nylon and should stand up to sock wearing. 


So with Kate we make a swatch for sure. Here is mine. But I did make a second swatch with one size down needles and have liked that better. I ended up casting on 60 stitches on 2.75mm needles. 


As the Sock-a-long is on zoom and set up at my sewing spot. Oh my, Knitting took over. 


A few days later after class, I had to dye some sock yarn. I had been getting all kinds of ads show up on my feed. So many pretty yarns. So I dyed these two. 


This one I am calling Chocolate Strawberries. I yarn I saw that inspired this, had a pale pink and my pink got away on me. I still love it and it is mine not like the one I saw. 


Then this one I call Birch trees and sky. Now can you see the black and white freckles are the birch bark the green for the tree tops and the blue sky. 


This photo might be the best way to see how it will knit out. I do not except any kind of row thing as the colours change is so quick. But I will love these colours. 

I still want to dye more yarn. Maybe this weekend. 


Monday, February 15, 2021

Milagro Workshop


On Saturday I spent my day taking a class on Zoom. The teacher was Dawn Piasta of Dewpoint Arts from Manitoba. The class was set up by the Edmonton and District Quilter's guild. We had a nice group of members signed up. I think I knew most of the ladies in the class. 

My sampling is the first photo. We ironed the fabric to freezer paper so that it stays in place better. We used water, Aloe and then a paint medium, I had goldens GAC 900.  I did some outlining with a Frixion pen for some outlining, and then I also sampled the Pigma pen. So some lines disappear and some stay. The Pigma pen did run in some places. 


We used the Dewent Inktease Pencils and Blocks. I did not have these but my mom had the two sets. So I got to use her pencils. They were new and I got to use them first, Thanks Mom


After sampling I got to work on this little deer, it was one of the images Dawn gave us to use in class. I used the frixion pen to do my lines. I spent time blending my colours a little. I made him red and orange mostly because the pencil set had a nice run. 


Here is my finished animal. I used the heat to set the colours and get rid of the lines. 

I could see using these to make some pretty fancy quilt labels. Or maybe a sweet little wall quilt that kind of looks like appliqué but is not. Dawn sometimes uses her drawing as appliqués too. The pencils can be used for little art landscape too. So many things to do. 

Sunday I took a second class form Dawn. I have not taken any photos yet. You will have to wait. I have a busy week and today is not a day off, I teach a bit tonight and have lots to do before that, and have a long list of work things to do. 


Wednesday, May 30, 2018

Paula Rafferty Class


I got to do a Paula Rafferty class for 2 days earlier in May. She was in Edmonton. 
I am slowly hand quilting this painted hand dyed fabric. I am using hand dyed thread too. 
It will be my background for my collage. I also have some stenciled leaves in gold also on it.  
Then I will add my paper bits and more stamped parts. 

Wednesday, March 28, 2018

Barn Block


On the weekend, Sunday, the Edmonton and District Quilter's Guild had a workshop on painting barn blocks. It was so much fun. The ladies that ran it did a great job!
 I did an eight point star. We used outdoor house paint. 


There were great pages to show us how to lay out our blocks on the 2 foot plywood boards. This one is for the 8 point star. 


I have used my good frog tape to mask the area for the red paint. There is one extra bit of tape. 


My red paint and the white but it does not show with the base paint. I did do a bit of touch up at the end. Not much as my frog tape was good. 

I am not sure were in the yard I will put this block. It is meant to hang on your barn. My hubby says no way. I would like a larger one for the real barn, then it could be seen from the hwy. I might put it on the horse fence or maybe in the corral on the horse shed. But my horses could nose muck it then. Later this spring/summer I will get it hung up. 

I have added this post to Let's Bee Social at Sew Fresh Quilts  


Wednesday, November 9, 2016

Shibori Dyed Fabric


After the 3 day class on dyeing cotton fabric, I also took the class on Shibori dyeing fabric, so 4th day. I was using cotton again but some people in the class were using wool for rug hooking. We had to bring our own dyes and all kinds of crazy bits to help with the shibouri. 


We I have done some of this before and I just love pole wrapping. When the teacher was not watching me I would wrap another piece of fabric on a pole and dye it. This was a 1/2 m dyed twice and folded like a fat quarter and then rolled. 


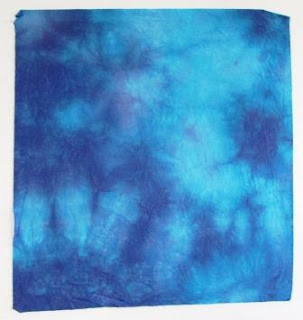
Blue water fabric, dyed twice


Darker blue water, dyed twice. 


This one has been dyed a few times (3 I think) and it was wrapped on a large nylon rope. The folds are smaller then the folds on the pole wrapped fabrics. 


Pole wrapped with shades of green. This has been dyed twice. 


These were also done twice and in the same dye bath both times, Yet they are a little different. Must have been how they were wrapped and the one on the right has more of the middle got some extra dye on it. 

I had to sometimes finish these at home at have the time to get the second dye bath done. So not all done in class time. All of these are fat quarter sized fabric. I just do not get dye to the inside of the fabric roll if I go bigger. 

Monday, November 7, 2016

Tray Dyed Fabrics


Part of the dyeing class I took had us do a few pieces of fabric in a tray. I have done some of this before. First I did the green fabrics on top. I ripped my 60" fabric into 11" wide strips. Why 11" it was the size of my tray. I folded the fabric like a loose accordion fold.  I did these two pieces. The first time I did it there was more yellow and some white areas that I did not like. So I did it all over again, knowing I would get parts even deeper. Love them, But I am not sure how I will use them now. 


I also did this 1 m piece in a tray. I pre-soaked the fabric in the soda ash solution, so it was wet. I then laid it over the tray and pinched the middle and gave it a spin. I tried to get all the outer edges to spin in to the tray, I think I had to help some corners in to the tray. I then poured the dye over the fabric in a cross like pattern. Let it sit and got the spiral. 

Saturday, November 5, 2016

3rd Day of Dyeing Workshop


I have more photos of some of the fabric I dyed in the workshop. We did more dyeing like it was paint. Many of the fabrics are small pieces like 10 by 12 or so. I did some dye on dry fabric like the Gemma fabric, then some wet fabric like the one above Gemma, you can see the dye ran into each other so much more. 


I love this little sky with lightening. I let it dry on plastic so there are also bubbles. 


Lighter sky and no bubbles.


This is more like a fat quarter size of fabric. A good swishy fabric.


Swishy on a fat 1/4


Swishy on a fat 1/4 and not too much moving it around. I love pink and green together. 

Thursday, November 3, 2016

Dye Workshop Continues


I have some more Colour to show you. These photos are from the first 2 days but were dyed by some of the other students in the class. 


Hope you are enjoying the colour!


Sara Judith was our teacher and the workshop was organized by the Focus on Fibre Art Association.


Tuesday, November 1, 2016

2nd Day of Dying


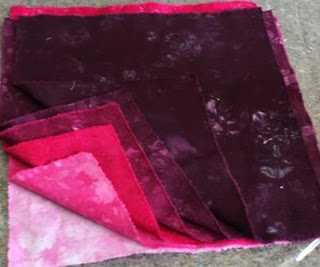
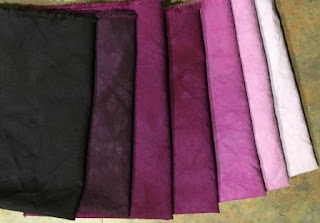
I started the 2nd dye day with picking the Red Violet. We did the shades, to the left is black added to the main colour. To the right is the pastilles made by using less dye and the white showing more.   


We also did contrasting colours and going though the colour wheel and not around it. So this was my red violet and yellow. 


This is my fabric when it was lightly washed and still very wet. It is hard to tell what was what in the darker colours. 

Monday, October 31, 2016

October Dying Workshop


Fresh out of the machine! I love the flash of colour everywhere. 


I took a 3 day workshop and these photos are the fabrics we dyed in the first day. 


Pastels colours


Shishy Colour

Wednesday, July 13, 2016

Felted Hat Class


The last three days I have been in a felted hat class with the beautiful and talented Andrea Graham. I really liked her class. She showed us each step so well and the finishing was so nicely done.  


First day I made my template, yes it is very large. This ended up not being the final template I added a brim to the hat after this. I forgot to get any photos on the second day so I missed my layout shot. 


This is kind of a start of the finish. I struggled with this. I was not really liking how it was going. 


I put holes in the dark purple but the pink was not showing very well. Now what? 3 days of work. 


So I ended up rolling the brim. OK now it is getting better. I still had not done anything with the spikes. They look a little crazy still here. 


This was a little sample Andrea did to show us some other options for the embellishing our hats or if we make a bag later. 


The group shot of the hats. So many nice ones. 


Last night I wet down my 3 spikes and clammed them to hold a spiral shape at the end. The hat is mostly dry now. 

Sorry of the bad selfy shots but I wanted to get some photos posted. My hat is done and ready for winter. 

Tonight at 7 pm Andrea is speaking at the Royal Alberta Museum RAM and I am planning on going. We are to bring our hats to the lecture.